Install Nextcloud 23 with Collabora and HPB on Debian 11 natively
This post will guide you on how to install Nextcloud with Collabora and the High-Performance backend for pushing Nextcloud notifications on Debian 11 server natively. No Docker, AppImages or Snap!
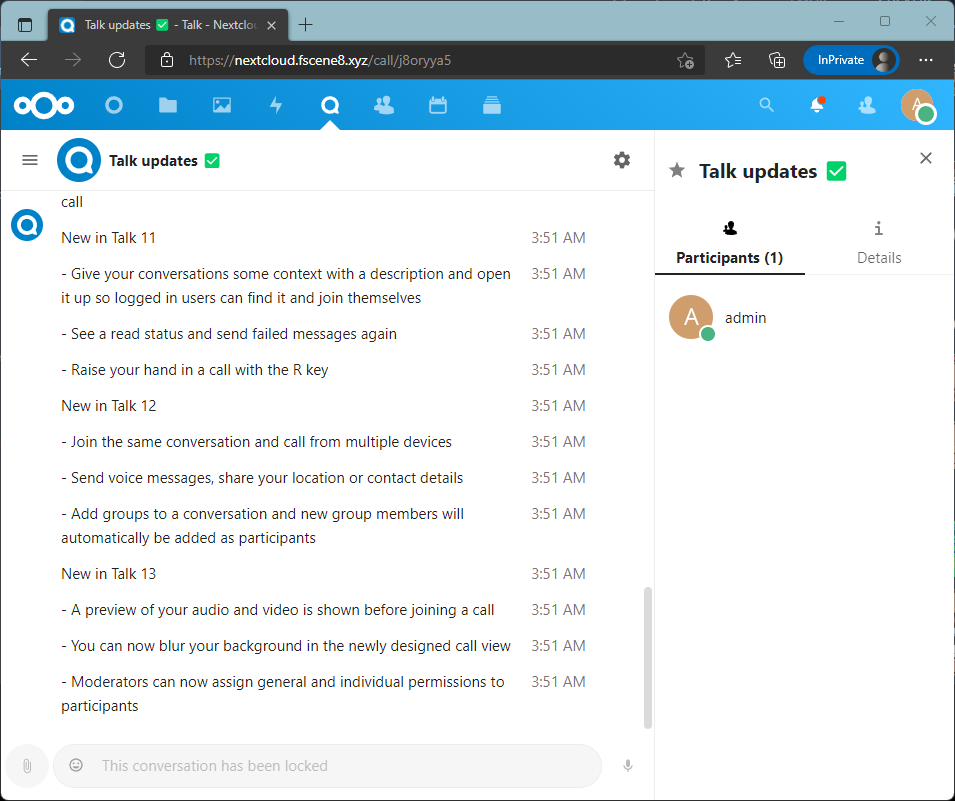
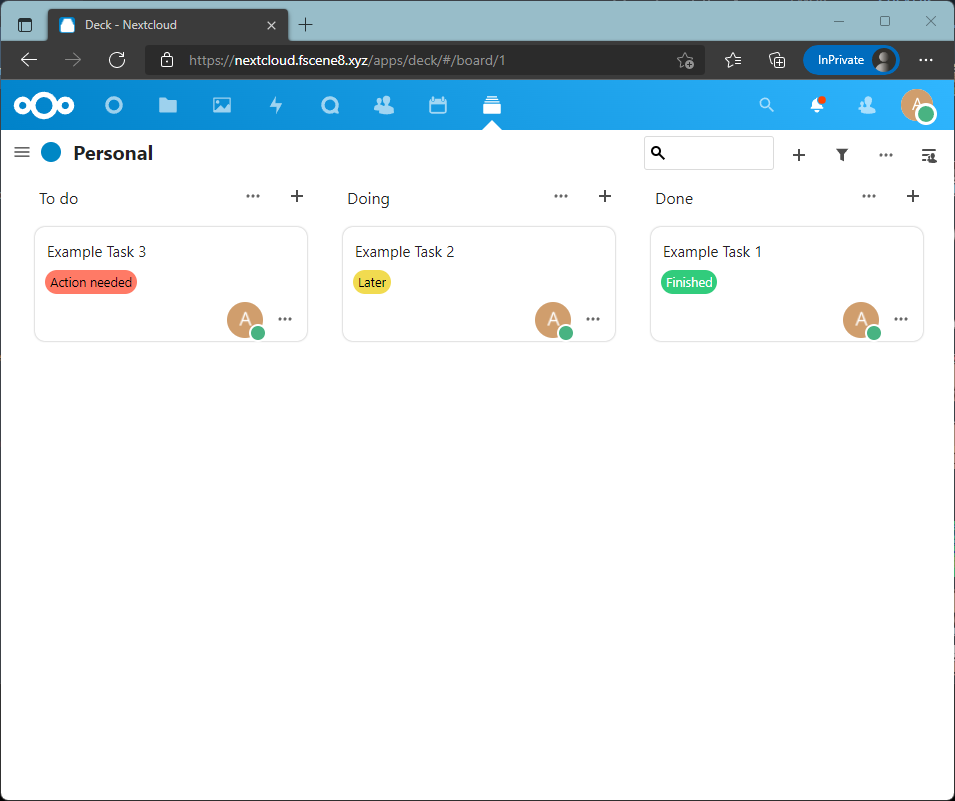

In this post:
- Prerequisites
- Part 1: Installing Nextcloud 23
- Part 2: Installing Collabora Online Office Suite
- Part 3: Installing High-Performance Backend
Prerequisites
You will need a running Debian 11 installed. You may install it locally or get one from any hosting providers, such as DigitalOcean and Linode.
You will also need a domain name for your Nextcloud server. It can be the current domain name you own now as we will be using subdomains in this guide.
Please set two new A record DNS for Nextcloud and Collabora each now. We will let the DNS update while we set up our server.
I will be using fscene8.xyz as my domain name and DigitalOcean as my hosting provider.
- Nextcloud server ->
nextcloud.fscene8.xyz - Collabora server ->
collabora-office.fscene8.xyz
All the commands are being executed as the root account. Log in as root either from the start or su. You can also type sudo at the start of each command as a normal user.
Part 1: Installing Nextcloud 23
Part 1.1: Set a hostname
Please set a hostname for your Debian server, if necessary.
hostnamectl set-hostname nextcloudMake sure to add a new entry in your /etc/hosts.
127.0.0.1 nextcloudTo see the changes take effect, relog to your server.
Part 1.2: Update your system
Make sure that your server is up-to-date.
apt update && apt upgrade -yPart 1.3: Installing prerequisite packages for Nextcloud
The prerequisite packages for Nexcloud basic installation are:
- Apache Web Server
- PHP
- MariaDB Database
- Redis Caching Memory Server
- SSL certbot
Install all of them.
apt install apache2 mariadb-server php-common libapache2-mod-php php-gd php-mysql php-curl php-mbstring php-intl php-gmp php-bcmath imagemagick php-imagick ffmpeg php-xml php-zip php-bz2 php-redis redis-server python3-certbot-apache
Part 1.3: Configure the Redis memory caching server:
Configure the Redis Memory caching server.
nano /etc/redis/redis.confFor nano, use ctrl + w to search for text.By default, Redis uses the networking port. Since we are only dealing with localhost and not going out, we going to use unixsocket for Redis. This is a more secure way for this guide setup. Once configured, any program can go through Redis without going thru the networking at all.
- Uncomment the line
unixsocket /var/run/redis/redis-server.sock.
This file will be used for its socket. - Uncomment the line below
unixsocketperm 700. - Change the line from
unixsocketperm 700tounixsocketperm 770.
Only the Redis Group Users can access the file. - Search for
port 6379. - Change the line from
port 6379toport 0.
The line is located at the bottom of the file.
This will disable the TCP port since we are using unixsocket. - Save the file with
ctrl+xand then pressy.
Part 1.4: Add Apache user to Redis group
usermod -aG redis www-dataPart 1.5: Setup Apache virtual host file
Create a new Apache virtual host configuration file nextcloud.conf with nano.
nano /etc/apache2/sites-available/nextcloud.confAdd the following line below and set theServerName to your domain name. Make sure DocumentRoot is pointing to /var/www/nextcloud.
<VirtualHost *:80>
        ServerName nextcloud.fscene8.xyz
        DocumentRoot /var/www/nextcloud

        ErrorLog ${APACHE_LOG_DIR}/error.log
        CustomLog ${APACHE_LOG_DIR}/access.log combined
</VirtualHost>
Save the config file and enable the nextcloud virtual site.
a2ensite nextcloudBefore reloading the Apache, enable the rewrite and headers apache modules. The rewrite is needed for the URL scheme for Nextcloud and headers is needed for the HTTPS and SSL. We will configure both of them later.
a2enmod rewrite headersRestart both Redis and Apache.
systemctl restart redis apache2Part 1.6: Setting up Nextcloud directory
Go to the Nextcloud download page and click on the "Details and download option". Right-click and copy the link for the .tar.bz2 file.
Paste the link after the wgetcommand.
wget https://download.nextcloud.com/server/releases/nextcloud-23.0.0.tar.bz2Extracts the file into the /var/www/ directory.
tar -xvf ./nextcloud-23.0.0.tar.bz2 -C /var/www/Change the ownership of extracted folder directory to Apache.
chown -R www-data: /var/www/nextcloudCreate a new directory for your Nextcloud user data. This is where the files for the cloud will be stored. It can be your external or network-attached storage device.
mkdir /nextcloud-dataChange the owner of the /nextcloud-data.
chown www-data: /nextcloud-dataYou can remove now the downloaded .tar.bz2. (Optional)
rm nextcloud-23.0.0.tar.bz2Part 1.6a: For external or network-attached storage devices
Mount your storage with permission 0770 for the file and directory.
//ipaddress/share /nextcloud-data cifs gid=33,uid=33,credentials=/root/.nextcloudshare,iocharset=utf8,comment=systemd.automount,file_mode=0770,dir_mode=0770 0 1For LXC unprivileged containers, you need to mount from the Proxmox web UI. The LXC needs to be a privileged container to mount devices directly. If you are still unable to mount your NAS, discard LXC and install a VM.
Now, you can visit your cloud domain and the Nextcloud page will be loaded if the DNS is updated. We have not yet configured SSL/TLS and MariaDB. This page will not work till the remaining two are installed.

Part 1.7: Enable HTTPS for Nextcloud
We going to use certbot to help us get your SSL/TLS cert. Enter the details required by the certbot. Choose the redirect option.
certbot --apacheChoose the 2: Redirect on this screen.
Please choose whether or not to redirect HTTP traffic to HTTPS, removing HTTP access.
- - - - - - - - - - - - - - - - - - - - - - - - - - - - - - - - - - - - - - - -
1: No redirect - Make no further changes to the webserver configuration.
2: Redirect - Make all requests redirect to secure HTTPS access. Choose this for
new sites, or if you're confident your site works on HTTPS. You can undo this
change by editing your web server's configuration.
- - - - - - - - - - - - - - - - - - - - - - - - - - - - - - - - - - - - - - - -
Select the appropriate number [1-2] then [enter] (press 'c' to cancel): 2
Visit your Nextcloud webpage and it will redirect you to the HTTPS version. You can check the cert and its expiry date.

Part 1.8: Installing the database
We will need to create a new database and user for Nextcloud. If you have not run mysql_secure_installation before, you need to set up a password for the MariaDB root user. Please read carefully at each prompt.
mysql_secure_installationIn order to log into MariaDB to secure it, we'll need the current
password for the root user. If you've just installed MariaDB, and
you haven't set the root password yet, the password will be blank,
so you should just press enter here.
Enter current password for root (enter for none):ENTER at this screenSetting the root password ensures that nobody can log into the MariaDB
root user without the proper authorisation.
Set root password? [Y/n] YY and press ENTER to setup MariaDB root user passwordFor the rest of the installation, accept the default answer provided.
Part 1.9: Creating a database and user for Nextcloud
Enter the database.
mariadbCreate a new database.
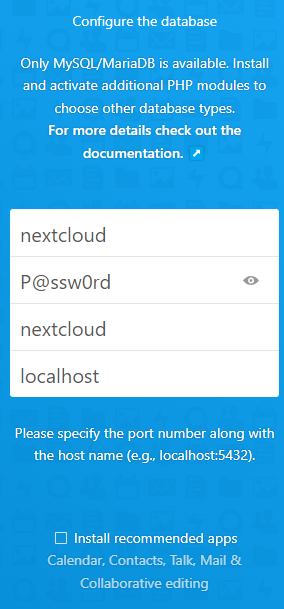
CREATE DATABASE nextcloud;Create a new user for Nextcloud. Replace the P@ssw0rd with a super-secure password.
CREATE USER 'nextcloud'@'localhost' IDENTIFIED BY 'P@ssw0rd';Grant the user all privileges for the Nextcloud database.
GRANT ALL PRIVILEGES ON nextcloud . * TO 'nextcloud'@'localhost';Exit the MariaDB console.
quitPart 1.10: Nextcloud GUI Wizard
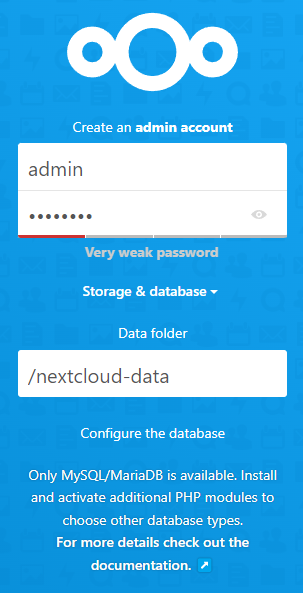
Visit your webpage and fill in the details. Make sure to uncheck the "Install recommended apps" checkbox. This will interfere with the installation of Collabora.
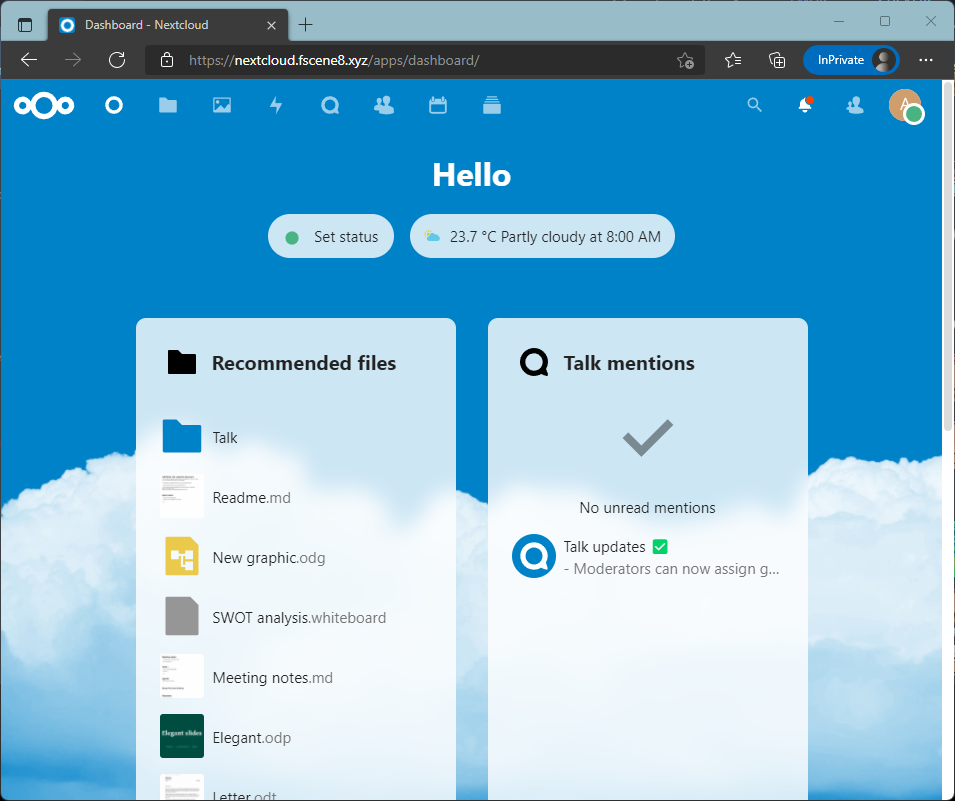
You will be logged in to the Nextcloud dashboard.
Part 1.11: Set recommended PHP and Apache settings for Nextcloud
Since you installed Nextcloud manually, it is currently using the default PHP option.
When you visit the Settings -> Overview page, you will be greeted with multiple warnings. We are going to fix this now.

Open the PHP configuration file.
nano /etc/php/7.4/apache2/php.ini- Search for
memory_limit = 128Mand change the value from128Mto512M. - Search for
output_buffering = 4096and change the value from4096toOff. 'Off' with the capital letter 'O'. - Save the file.
Open the Nextcloud Apache configuration file.
nano /etc/apache2/sites-enabled/nextcloud-le-ssl.confAdd the following line below inside the <VirtualHost *:443> tag. As long it is inside the tag, it is fine.
The line below will set all headers that are being sent out with HTTPS, including the outgoing HTTP. For the next 180 days, the client web browser will not make any attempt to make an unencrypted connection to your server.
<IfModule mod_headers.c>
	Header always set Strict-Transport-Security "max-age=15552000; includeSubDomains"
</IfModule>
<Directory /var/www/nextcloud/>
	AllowOverride All
</Directory>
Restarts the Apache webserver.
systemctl restart apache2Reload your Nextcloud settings page. We should have fixed a number of issues.

Part 1.12: Set recommended Nextcloud settings
Now, we are left with a warning from our Nextcloud configuration. There are only two configurations missing, memory cache and phone region.
Open up the Nextcloud configuration file.
nano /var/www/nextcloud/config/config.php
Add these lines after 'installed' => true, and before the closing bracket );.
  'htaccess.RewriteBase' => '/',
  'default_phone_region' => 'SG',
  'memcache.local' => '\OC\Memcache\Redis',
  'memcache.distributed' => '\OC\Memcache\Redis',
  'redis' => [
  'host' => '/var/run/redis/redis-server.sock',
  'port' => 0,
],
Save the config file and run the Nextcloud occ command, shown below, as the webserver for these changes to take effect. You will get a reply, .htaccess has been updated.
sudo -u www-data php /var/www/nextcloud/occ maintenance:update:htaccessReload your Nextcloud settings page and you will see a green tick.

Now, your basic Nextcloud is up and running.
Part 2: Installing Collabora Online Office Suite
The Collabora Online Office Suite requires another domain name. You can use the subdomain for this. I will be using collabora-office.fscene8.xyz as my domain.
Part 2.1: Installing Collabora Server
We will install the prerequisite packages for Collabora and then, import the Collabora package signing keys.
apt install gnupg
apt-key adv --keyserver keyserver.ubuntu.com --recv-keys 0C54D189F4BA284D
echo 'deb https://www.collaboraoffice.com/repos/CollaboraOnline/CODE-debian11 ./' >> /etc/apt/sources.list
apt update
apt install coolwsd code-brand hunspell
Create a new Apache configuration file for Collabora. Open the collabora.conf. This will be an empty file.
nano /etc/apache2/sites-available/collabora.confCreate a virtual host with the ServerName set to the Collabora domain name. This will be set as a reverse proxy soon. For now, we need to have a virtual site to be up to get the SSL cert.
<VirtualHost *:80>
        ServerName collabora-office.fscene8.xyz

        ErrorLog ${APACHE_LOG_DIR}/error.log
        CustomLog ${APACHE_LOG_DIR}/access.log combined
</VirtualHost>
Enable the site and reload Apache.
a2ensite collabora
systemctl reload apache2
Next, we are going to set up SSL for the Collabora virtual host. Accept the default answers provided. But choose the option to expand the certification.
certbot --apacheEnable the modules needed for reverse proxy.
a2enmod proxy proxy_wstunnel proxy_httpBefore reloading the Apache service, we are going to set the configuration for the reverse proxy in the Collabora 443 Apache configuration file.
nano /etc/apache2/sites-enabled/collabora-le-ssl.confAdd these settings inside the virtual host 443 tag.
        # Collabora config:
        Options -Indexes

        # Encoded slashes need to be allowed
        AllowEncodedSlashes NoDecode

        # Container uses a unique non-signed certificate
        SSLProxyEngine On
        SSLProxyVerify None
        SSLProxyCheckPeerCN Off
        SSLProxyCheckPeerName Off

        # keep the host
        ProxyPreserveHost On

        # static html, js, images, etc. served from coolwsd
        # (broswer is the client part of Collabora Online)
        ProxyPass /browser http://127.0.0.1:9980/browser retry=0
        ProxyPassReverse /browser http://127.0.0.1:9980/browser

        # WOPI discovery URL
        ProxyPass /hosting/discovery http://127.0.0.1:9980/hosting/discovery retry=0
        ProxyPassReverse /hosting/discovery http://127.0.0.1:9980/hosting/discovery

        # Capabilities
        ProxyPass /hosting/capabilities http://127.0.0.1:9980/hosting/capabilities retry=0
        ProxyPassReverse /hosting/capabilities http://127.0.0.1:9980/hosting/capabilities

        # Main websocket
        ProxyPassMatch "/cool/(.*)/ws$" ws://127.0.0.1:9980/cool/$1/ws nocanon

        # Admin Console websocket
        ProxyPass /cool/adminws ws://127.0.0.1:9980/cool/adminws

        # Download as, Fullscreen presentation and Image upload operations
        ProxyPass /cool http://127.0.0.1:9980/cool
        ProxyPassReverse /cool http://127.0.0.1:9980/cool
Save the file and restart the Apache.
systemctl restart apache2Part 2.2: Changing the Collabora Office configuration
Open the configuration file.
nano /etc/coolwsd/coolwsd.xml- Search for
allowed_languagesand set the tag value toen_GBfor English, as Singapore uses British English. You might need to scroll all the way to your right to find the value at that line. - Search for the
SSL Settings. There will be multiple results. You will need to look for theSSL setingswith 2 comments inside it.
For the inner tag that contains<enable type="bool"and set the value tofalse.
for the inner tag that contains<termination descand set the value totrue
    <ssl desc="SSL settings">
        <!-- switches from https:// + wss:// to http:// + ws:// -->
        <enable type="bool" desc="Controls whether SSL encryption between coolwsd and the network is enabled (do not disable for production deployment). If default is false, must first be compiled with SSL support to enable." default="true">false</enable>
        <!-- SSL off-load can be done in a proxy, if so disable SSL, and enable termination below in production -->
        <termination desc="Connection via proxy where coolwsd acts as working via https, but actually uses http." type="bool" default="true">true</termination>
This will disable the SSL between the Collabora to the Apache webserver. This is safe as the data is contained in the localhost. However, any outgoing traffic will be terminated with SSL.
Save the file and restart Collabora.
systemctl restart coolwsdInsert the Nextcloud domain name in /etc/hosts file. This is required for Collabora to resolve.
nano /etc/hosts127.0.0.1 nextcloud.fscene8.xyzPart 2.3: Install Collabora Online Nextcloud App
Install Collabora Online App from the Nextcloud App page.

Go to your Nextcloud Settings webpage and go to the Office section. Select the radio button "Use your own server". Set the URL of your Collabora server.

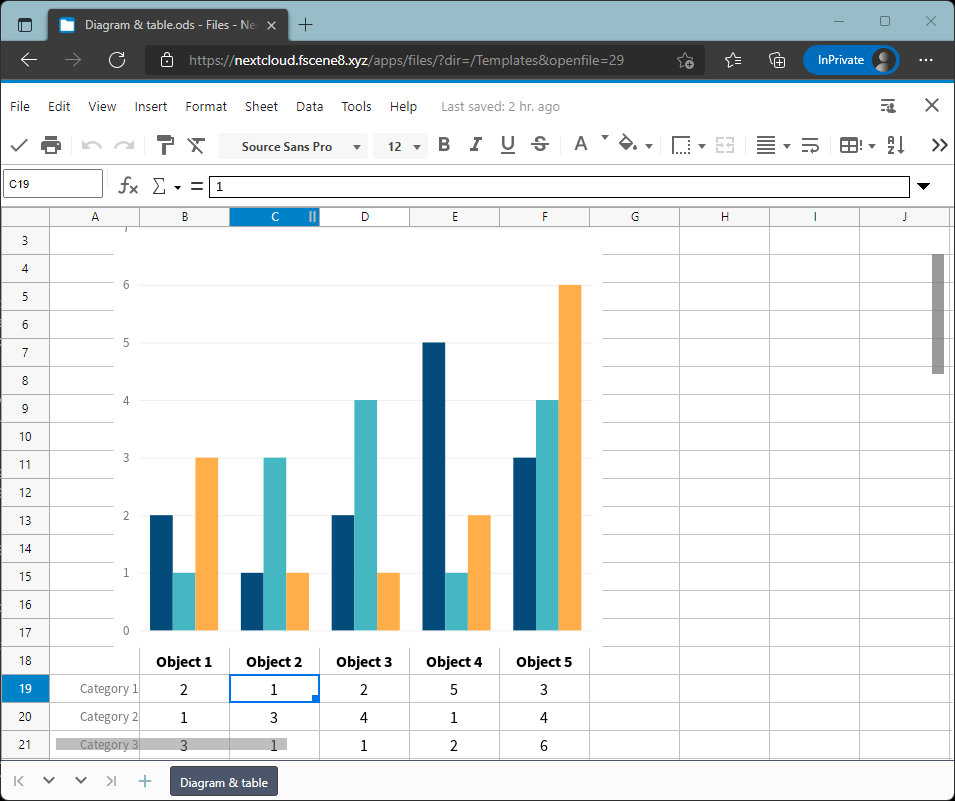
Now, let's open a document file from Nextcloud. It will open with Collabora Online.
Part 3: Installing High-Performance Backend
What is HPB?
High-Performance Backend is a notification tool to make your server run efficiently.
Without it, the client will use any open PHP page to retrieve notifications every 30 seconds. This is a pull process.
If the client opens 10 tabs, that is 10 times 30 seconds of retrieval. If there are 100 users open 1 tab, your server will be serving these requests regardless of whether there's any new notification for them. This really adds ups the resource usage.
With HPB, this process becomes a push process. The client will wait and the server will push notifications to them when they are ready. This process uses lesser resources.
Part 3.1: Install the Client Push App from the Nextcloud App Page

Part 3.2: Setup Push Notification in Nextcloud Server
Run the notify_push:setup as webserver
sudo -u www-data php /var/www/nextcloud/occ notify_push:setup
Open up another terminal or SSH session. The setup script will instruct us on how to set up the service.
Create a new file, /etc/systemd/system/notify_push.service and insert the following line. Make sure that the URL is your Nextcloud URL.
nano /etc/systemd/system/notify_push.service[Unit]
Description = Push daemon for Nextcloud clients
[Service]
Environment=PORT=7867
Environment=NEXTCLOUD_URL=https://nextcloud.fscene8.xyz
ExecStart=/var/www/nextcloud/apps/notify_push/bin/x86_64/notify_push /var/www/nextcloud/config/config.php
User=www-data
[Install]
WantedBy = multi-user.targetEnable the service.
systemctl enable --now notify_pushChange back to the previous terminal and press ENTER for the next instruction.
We need to add the proxies settings to our Nextcloud Apache configuration file. Change to the other terminal to set up the proxy.
nano /etc/apache2/sites-available/nextcloud-le-ssl.conf ProxyPass /push/ws ws://127.0.0.1:7867/ws
ProxyPass /push/ http://127.0.0.1:7867/
ProxyPassReverse /push/ http://127.0.0.1:7867/Restart the Apache webserver.
sudo systemctl restart apache2Change back to the previous terminal and press ENTER. It will check and see if the configuration is set up correctly.
We have reached the end of the guide. I hope I am able to help you with your Nextcloud setup.
Why not use Docker for this?
The native Linux packages use less space and resources on your server. It supports lower processing power and at the same time, supports more users.
Docker will use more resources as it has to run in a container environment. I faced a few Docker commands that are so hard to work with.
In my opinion, most Linux native packages are easier to be configured as I can refer to their documentation and everything is exactly where it is. For Docker packages, their configuration is confusing and harder. Files are not present at the location you expect. Sure, find / -iname "*texttosearch*" does help but why live the hard way.
In the end, I scarp Docker and went natively. I am not a fan of Docker.
