Create A Domain Controller with Windows Server 2019 VM In A Homelab Network
In this post:
- Introduction
- Setting Up The Lab Network
- Creating a Domain Controller
- Configuring the DNS Server
- Configuring the DHCP Server
Introduction
I have installed a Windows Server 2019 in a VM in the previous post. Currently, the VM is the only machine that is alive in the new network. That's very lonely.
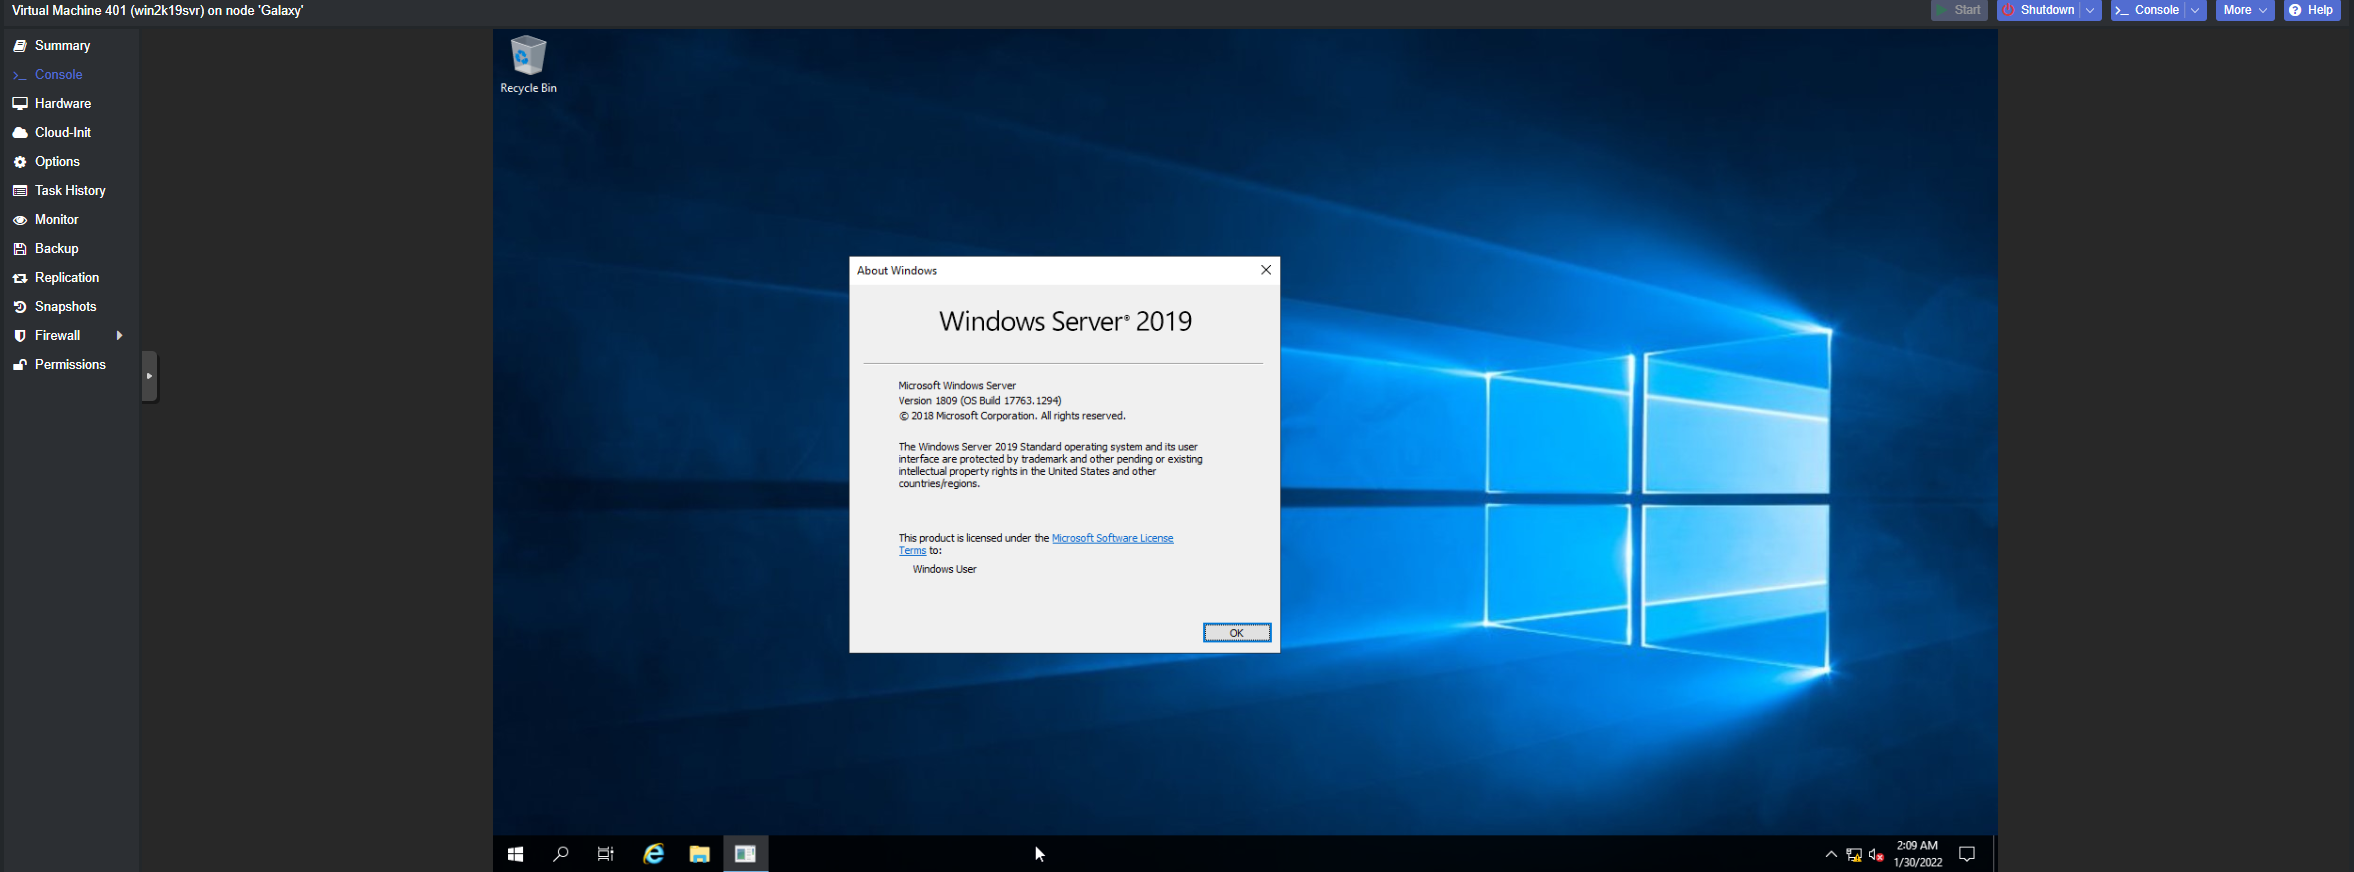
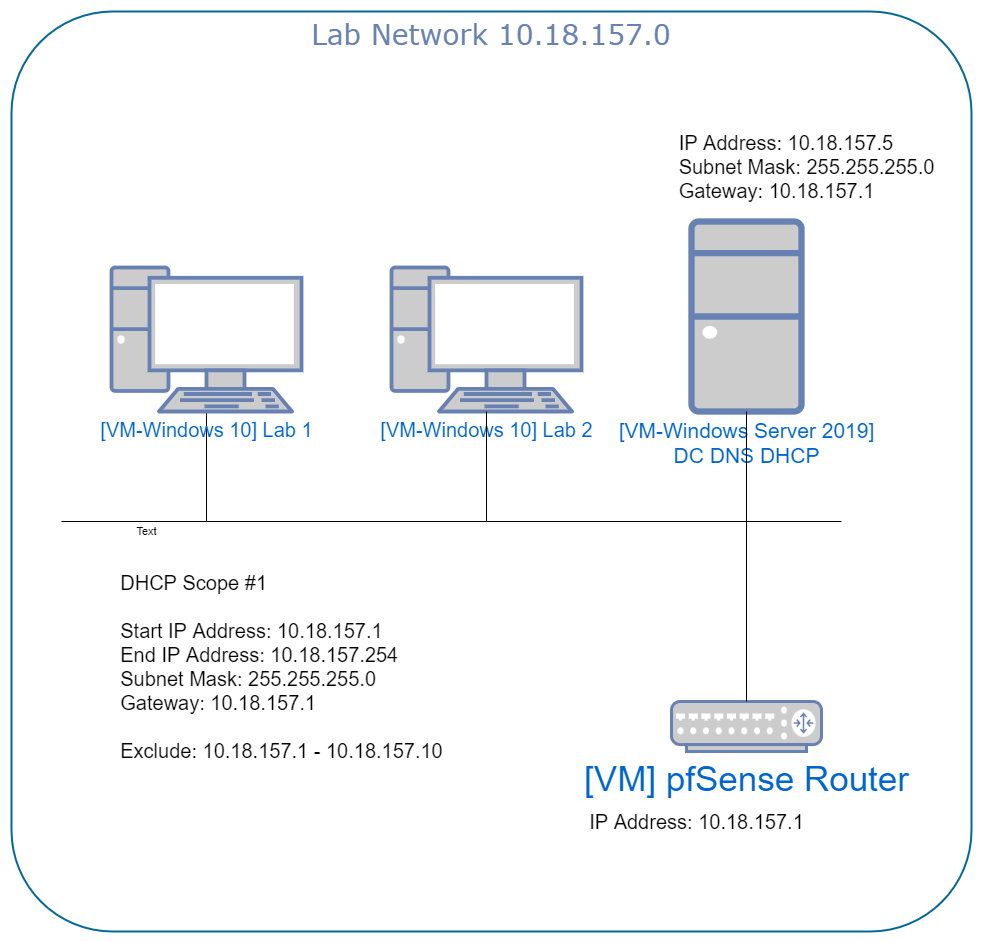
By the end of this post, the VM will become a Domain Controller for the lab network. It will also be running DNS and DHCP servers for the network. It will be accompanied by a virtual router and a Windows 10 VM to test to make sure the DC, DNS and DHCP are working.
In order to create a Domain in the lab network, at least one Domain Controller must exist. A Domain Controller requires at least one Active Directory Domain Service running in the network. And the Active Directory Domain Service requires DNS and DHCP Service in the network. They can be at the same server or separate servers.

I isolated the lab network from my home network to prevent countless headaches, frustration, and disruptions to my main home network. The lab network will use the DNS server and DHCP server in the Windows Server 2019.
To connect between those two networks in life, a router is needed. That is because a router is used to bridge and connect two separate networks.
I used a Linux VM that is running pfSense, an open-source router solution. This allows me to connect to my lab network from the outside network, only if the pfSense router firewall rules allow it.
This allows the possibility to expose a service from my lab network to my home network or public with port forwarding at the pfSense router and configuring a reverse proxy at Ngnix Proxy Manager on my home network.
You can skip the next section if you do not need the lab network to communicate externally. Your lab network will only be the Domain Controller and the windows client. The next step is to make the lab network to be able to connect to the outside network with port forwarding and firewall rules if they are set.
Setting Up The Lab Network
Isolating the lab network from the home network
I installed pfSense Community Edition as the router and set up 2 network interfaces in Proxmox, one for WAN and one for LAN. Both of them are configured to run a separate network. The .iso can be downloaded from here.


Finally, I turned off the DHCP at the pfSense to make way for the Windows Server DHCP.
For VMware ESXi or Workstation, you need to turn off DHCP at the Virtual Network Editor and pfSense router. For the pfSense hardware, you need to have both interfaces, Host-Only and Bridging or NAT, attached.
Firewall Rules for pfSense
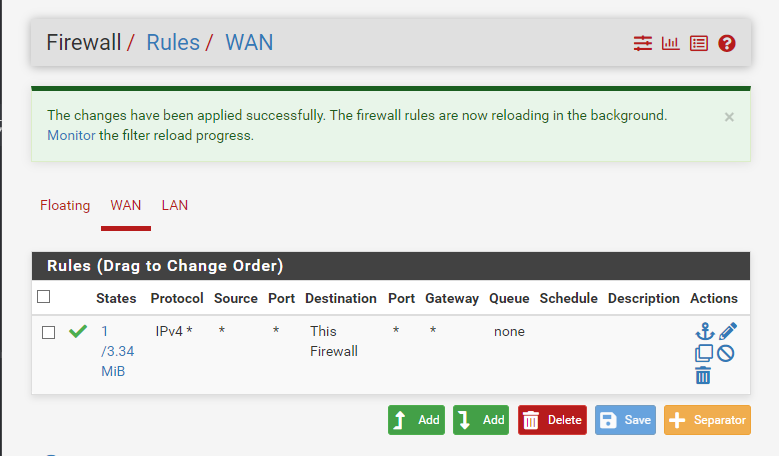
I created a firewall rule to enable devices from the WAN network to access the router only. This enables me to access the router's web portal from my home network and any ports that the router port forwarded.
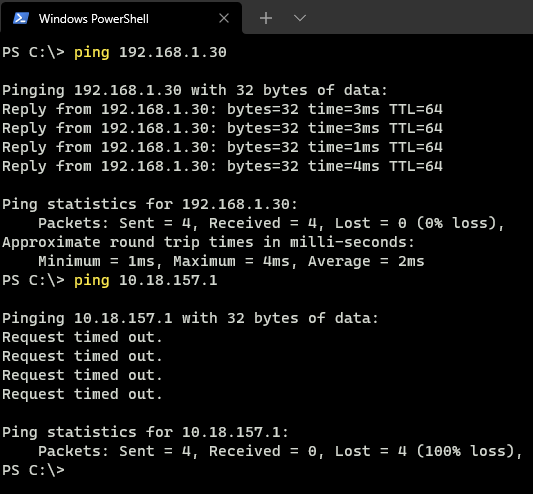
I checked from my home network to confirm that I am able to ping to the interface exposed to the WAN. But not the LAN. This is the correct setting.
Creating a Domain Controller
Configuring VM Network and Active Directory Domain Service (ADDS)
In Proxmox, I have configured the Windows Server 2019 VM network interface to use the same network as the pfSense router. A fresh windows server installation comes with no settings or services configured by default.
The first thing to do after a fresh Windows Server 2019 installation is to set a static IP address and change the hostname. Once I have set them, I reboot the server.


Once the server rebooted, I check that the server is able to ping to the pfSense router and nothing from the WAN network. Connecting to my home devices (WAN Network) is not allowed because of the pfSense router port forwarding and firewall rules.

Configuring Windows Server 2019
The lab network is now ready. Let's continue with the domain controller setup. Open up the Server Manager to continue setting up the Windows Server 2019.

Installation Type

Server Selection
Make sure the server name and IP address are correct.

Adding the Server Roles
On the Server Roles page, select the roles, add any prerequisite features and included management tools that come with it.
Roles to be checked:
- Active Directory Domain Services
- DHCP Server
- DNS Server
Once all 3 selected, click the Next button.

Features
The features were added automatically based on the roles selected on the previous page. Skip this page and click the Next button.

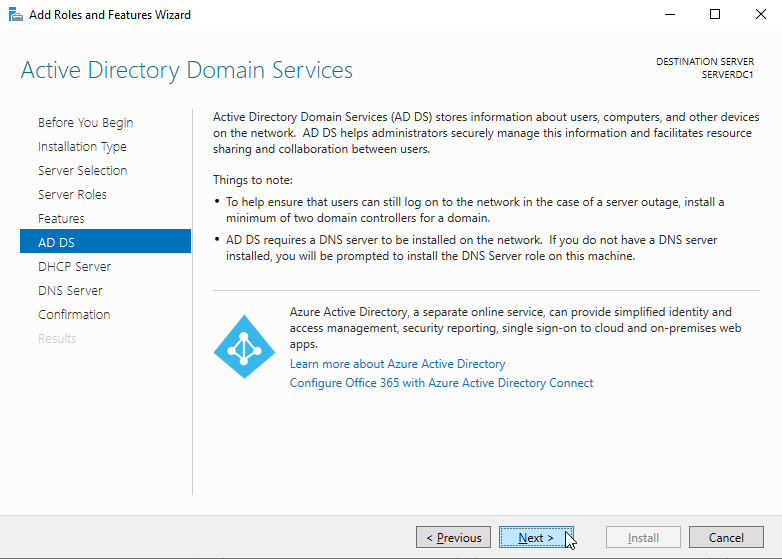
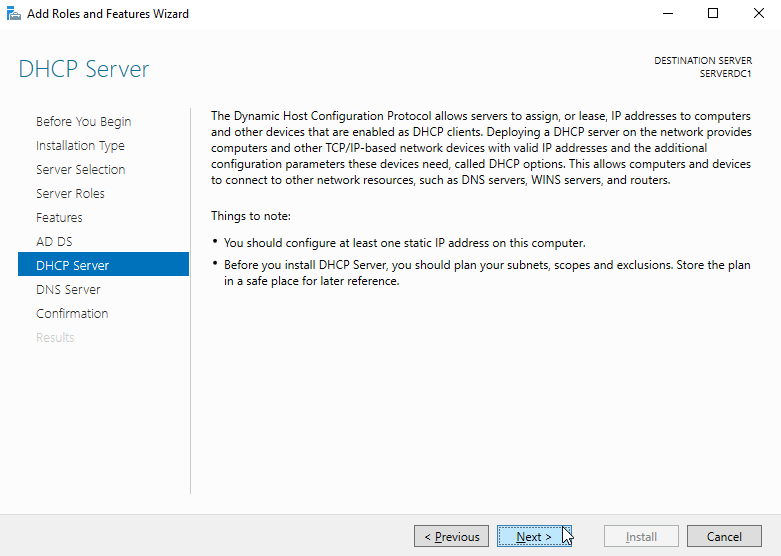
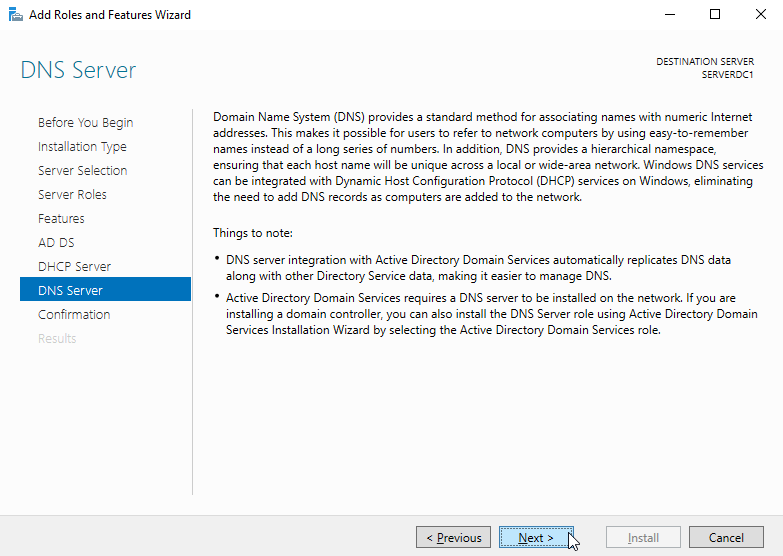
AD DS, DHCP Server and DNS Server
The next 3 pages are to educate us on those services. Skip those pages by clicking the Next button.

Confirmation
At the confirmation page, check the "Restart the destination server automatically if required" selection and click the "Install" button.

Result
Once it is successfully installed, click on the "Promote this server to a domain controller".

Promoting server to a domain controller
After selecting the "Promote this server to a domain controller", select the "Add a new forest" and enter the Root domain name. For my lab, I type in lab.local.

As this is the only active directory server in the lab network, leave these setting values as default.

The domain name lab.local will only exist internally in the lab network. There is no need to enable DNS delegation.

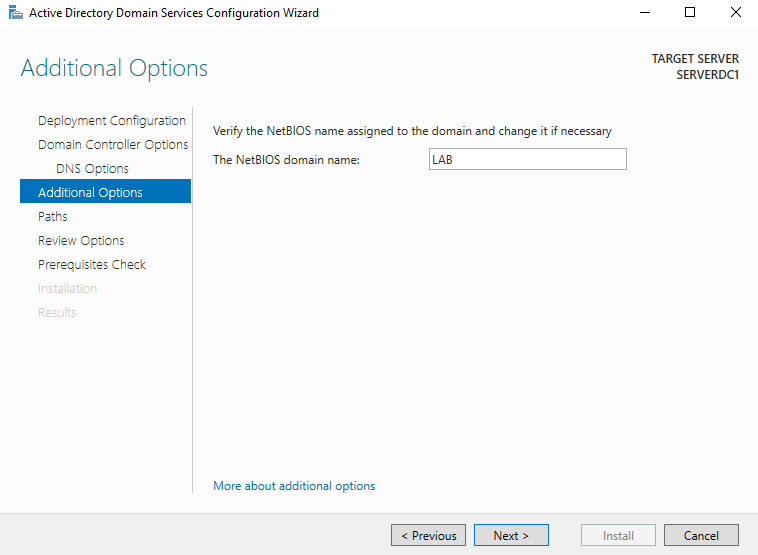
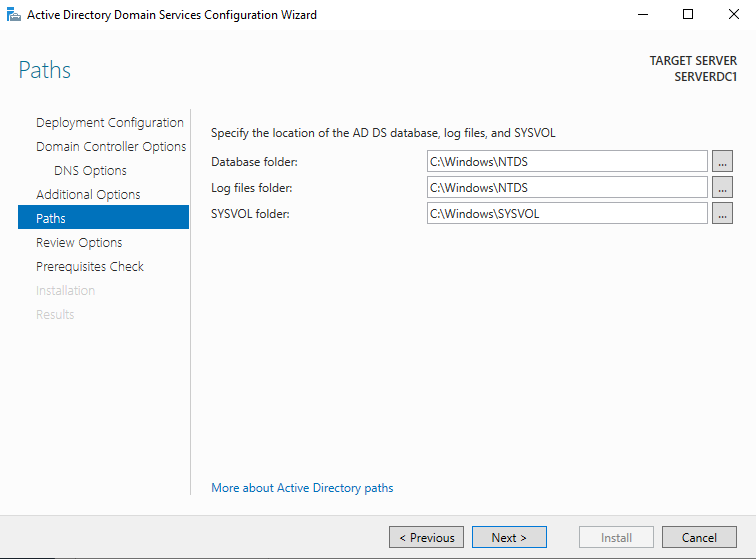
Additional Options and Paths
Accept the default values and click the "Next" button.
Prerequisites Check
The first warning is telling us that the Server will not be able to communicate with Windows NT 4.0. And the second warning tells us that it can not find the parent zone for lab.local.
These warnings are totally ok to ignore because this server going to be the only domain controller and the lab.local will only exist internally in the lab network.

The server will restart automatically after the "Install" button is clicked.
Once the server reboots, notice the LAB domain at the front of the username. Log in to the account. This means that we are logging in with a domain user account.

DOMAIN\USERNAMEDouble-check and confirm the domain by running the set command in the CMD.

USERDOMAIN=LABConfiguring the DNS Server
Setting Up Reverse Lookup Zone and DNS Forwarders
Setting up Reverse Lookup Zone
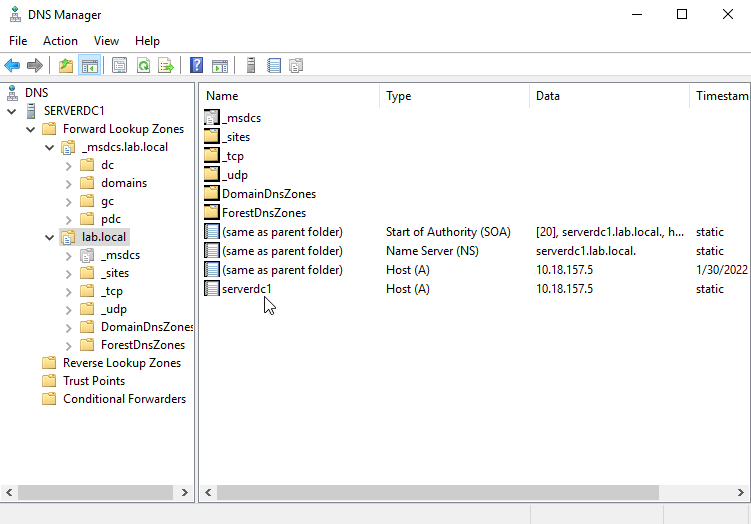
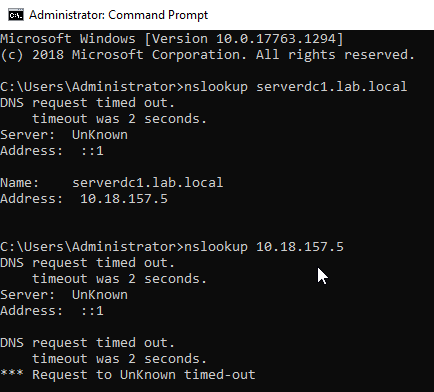
The first thing I like to do is to insert a new reverse lookup entry for the server at the DNS. As of now, only the forward lookup is being entered by default.
Forward Lookup Zone will resolve domain name (serverdc1.lab.local to IP address 10.18.157.5), while Reverse Lookup Zone is the other way around.
Checking the Forward Lookup Zone
Search DNS Manager from the Start Menu and open it. Check the lab.local zone inside the Forward Lookup Zone. I confirmed the record by running nslookup domainname in the CMD.
Adding a new Reverse Lookup Entry
A new zone has to be created first to create a new entry. Add a new zone by selecting Action -> New Zone.

Zone Type
Select Primary Zone and check the "Store the zone in Active Directory". Click "Next".

Active Directory Zone Replication Scope
For the replication scope, select the second option "To all DNS servers running on domain controllers in this domain: lab.local".
If I were to set up a second DC for the lab.local domain, the DNS record will be replicated at the second DC but not to the subdomains. Click "Next".

Reverse Lookup Zone Name
Select "IPv4 Reverse Lookup Zone" and click "Next".

Enter the IP Network Address that you are using and click "Next".

Dynamic Update
Select the first option. Click "Next" and "Finish".

Create a new PTR record for Reverse Lookup DNS
The reason I like to have both forward and reverse lookup zone for the DC server is that some applications or services, that I going to install later on, might need these records.
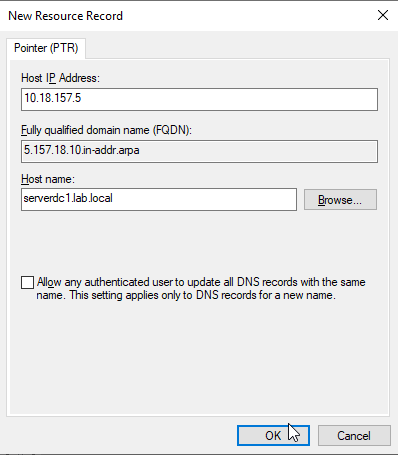
Right-click the new zone and select "New Pointer (PTR)".

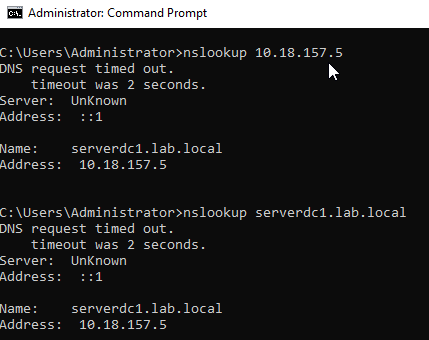
Insert the Host IP address and the Host name and click "Ok". Do a nslookup 10.18.157.5 in a CMD. This will resolves the same as nslookup serverdc1.lab.local.
DNS Forwarders
Right now, the DNS is unable to resolve any records that are not in the DNS Forwarded Lookup Zone. If you don't want the devices to resolves any external records, you can skip this step and proceed to configure the DHCP server.

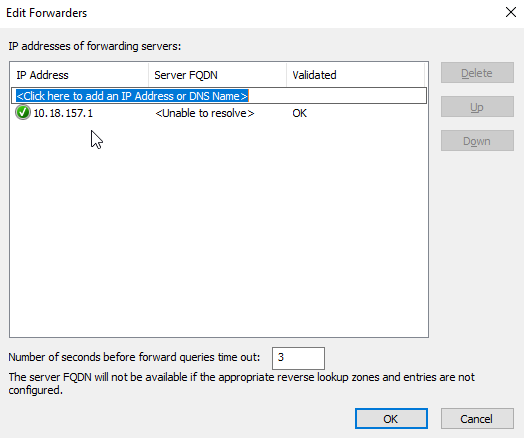
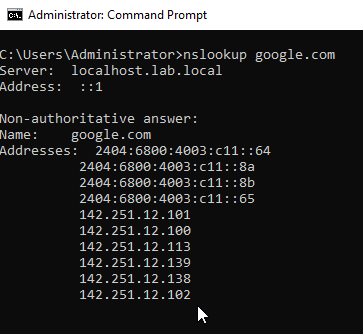
google.comBy having a DNS Forwarder, it will forward any request that it is unable to resolve to the pfSense router. The pfSense router will then forward it to the pi.hole DNS server at WAN network.
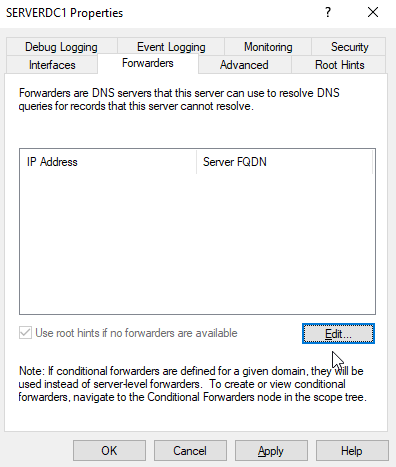
To set DNS forwarders, right-click the SERVERDC1 and click on Properties.

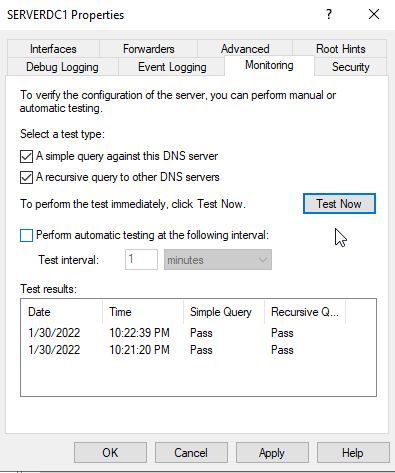
Go to the 2nd tab labelled Forwarders. Click on the "Edit" button and enter the IP Address of the forwarder. You can do a simple DNS test at the "Monitoring" tab.
google.comConfiguring the DHCP Server
Adding a New Scope and enabling DHCP Relay
I will add the DHCP scope first before enabling the DHCP on the server.
Adding a New Scope
Search for DHCP in the Start Menu and open it. Right-clock the IPv4 and select New Scope.

Scope Name
Insert the scope name and description to identify the DHCP scope.

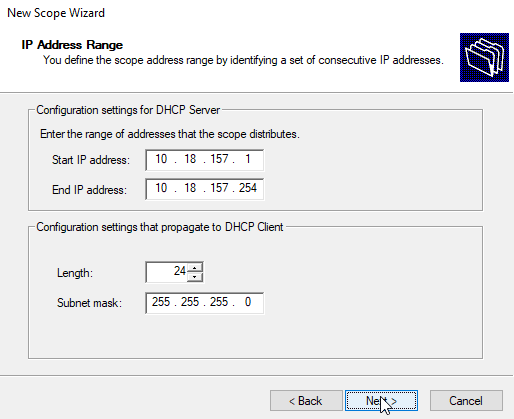
IP Address Range
Insert the start IP address, end IP address and the subnet mask values.
Add Exclusion and Delay
I want to reserve the first 10 IP addresses for my upcoming servers and services. This is where you should set yours too.

Lease Duration
The lease duration is the amount of time before they check with the DHCP server if they can continue using the same IP address. If the clients did not made any request when the lease expires, the DHCP server will release that IP to other clients.

Configure DHCP Options
DHCP options are settings that the DHCP server gives out to the client devices. Click "Next" to configure the DHCP default gateway and DNS IP address.

Router (Default Gateway)
I set my pfSense IP address as the default gateway IP address.

Domain Name and DNS Server
For this page, it will auto set for me. Unless you want to use another DNS server or set up a subdomain of an active directory of an FQDN, you should not change any values here

WINS Server
WINS is not being used that much these days. WINS is the predecessor to DNS and this is for legacy support. It was used to resolve NetBIOS computer names to IP addresses. Leave this blank.

Activate Scope
Activate the scope now.

Enable the DHCP Server
Go to Server Manager and click on the notification flag to open the notification. Click on the "Complete DHCP configuration" to enable the DHCP server.

Click "Next" and click "Commit" on this screen.

Activate DHCP relay on pfSense Router
You may skip this step if you do not wish to enable the DHCP relay at your router.
I will enable the DHCP Relay for my LAN interface at the router. The DHCP relay will send the DHCP packets from the lab network to my DHCP server.

Check if the DHCP is working
I have a VM running Windows 10 on the lab network. By running ipconfig /all on that machine, I can confirm my DHCP server is running.

From the server, we can check the connected client by going into the DHCP Manager.

Success! I have created an isolated Virtual Network, with pfSense router, Windows Server 2019. The Windows Server is now a Domain Controller with DNS and DHCP server up and running.
This guide can also work with VMware Workstation or other virtualization software. You will only need to prepare and configure the virtual network first, depending on your design.
For my next post, I might be creating a new user account, computer account and organization unit. Who knows....
